Taggie Blanket
Skill Level: Beginner
Skills Attained: Piecing Fabric (beginning step of a quilt), Slip Stitch |
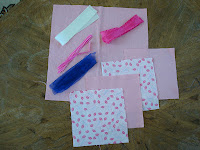
| Supplies needed for the Taggie Blanket |
Supplies:
Sewing Machine
Scissors (or rotary cutter and mat)
Pins
(4) 7" squares of fabric (for top of taggie blanket)
(1) 13 1/2" square of fabric (for backside of taggie blanket)
(16) 6" pieces of ribbon (varying types and colors)
If you are someone who has always wanted to sew a quilt but does not know where to begin, this week's Taggie Blanket project is for you! You will learn the basic steps of piecing together fabric, which is the building block of making a quilt. The final product will be an adorable little blanket any baby is sure to enjoy.
I first saw a Taggie Blanket at one of my friend's baby showers nearly two years ago. Many babies love different textures, and the assortment of fabrics and ribbons of this small blanket provides various textures for little ones to play with. Be creative and have fun with selecting the fabrics and ribbons for this project!
1. To begin, lay out the four 7" squares in the pattern you would like it sewn together. If you have a patterned fabric such as stripes, make sure you place the fabric in the direction you would like it to be sewn together.
 |
| Lay out the 7" squares in the desired design. |
2. Pin one square to another square -- right sides together -- along one edge. Do this to the other set of squares. Sew a straight stitch using a 1/4" seam allowance. (Refer to Mom's Tip #2.) View the video below for a more detailed explanation.
3. After sewing the two sets of squares together, press the seams open. You now have two rectangular pieces. Next, pin the two rectangular pieces together -- right sides together -- making sure that your seams are aligned. View the video below for a more detailed explanation.
 |
| Pin the pressed seam open to ensure the fabric does not bunch. |
 |
| Make sure the seams are aligned before you pin the pieces together. |
 |
| The back side of the top panel will look like this after you have pressed open both seams. |
4. Now that the top side of your Taggie Blanket is complete, sew the top side to the 13 1/2" square backside of the Taggie Blanket. Lay the right sides of the fabric together and begin pinning all four sides of the square. As you pin, fold each of the 6" ribbons in half creating a loop, and place the loop toward the inside of the fabric between the two pieces of fabric; secure the ribbons in place with pins. Once the blanket is pinned, sew a 1/4" seam allowance around all four sides leaving a 3" - 4" opening on one side. The opening allows you to turn the blanket right-side out. For a more detailed explanation, watch the video below.
 |
| You will sew around all four sides of the square except one 3" - 4" opening so that you can turn the blanket inside out. |
 |
| Snip a small piece of the corner before turning the project inside out. This prevents the corner from bunching. |
 |
| The final step is to sew the small opening shut using a slip stitch. |
Follow the pictures and their respective captions below for instructions on how to perform a slip stitch.


0 Response to "Taggie Blanket"
Post a Comment