Using a Rotary Cutter

Skill Level: Beginner
Skills Attained: Rotary Cutting
Supplies:
- Rotary Cutter
- Cutting Mat (Recommend "self-healing", grid mat)
- Straight-Edge/Ruler
- Scrap Fabric
Any sewing project requires you to cut fabric. You may either cut the fabric by: 1) marking it using a straight edge or using a pattern and cutting it with scissors, or 2) using a rotary cutter. A rotary cutter is primarily used for cutting straight edges. Using a rotary cutter can be an adjustment if you have never used one before, but you will notice straighter edges and more precise measurements. You do not need to invest in a rotary cutter and cutting mat for many projects as it can be expensive. However, if you intend to do a lot of sewing, these items may be a worthwhile investment. In this post, you will learn the basic steps of using a rotary cutter. This will be a good reference page for future sewing projects.
Here is a video of how to use a rotary cutter:
Here are step-by-step instructions and tips for using a rotary cutter:
Before using a rotary cutter on a project, practice with scrap fabric. Let's practice making 3" blocks for a quilt.


The first cut will be to "clean up" an edge so that the fabric is straight. Align the ruler along a vertical line on the mat so that you waste as little fabric as possible.


Here is a video of how to use a rotary cutter:
Here are step-by-step instructions and tips for using a rotary cutter:
Before using a rotary cutter on a project, practice with scrap fabric. Let's practice making 3" blocks for a quilt.
After your fabric is ironed (You do not need to wash the fabric when practicing with scrap fabric.), fold the fabric in half ensuring that the edges align as much as possible and the entire piece of fabric fits on the mat.

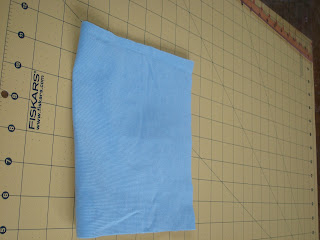


Align the bottom edge of the fabric along a horizontal line on the mat.

The first cut will be to "clean up" an edge so that the fabric is straight. Align the ruler along a vertical line on the mat so that you waste as little fabric as possible.

If you are right handed, apply pressure to the ruler with your left hand in the middle of the ruler and place the rotary cutter in your right hand. (If you are left-handed, place your right hand on the ruler and place the rotary cutter in your left hand.) The blade should be facing the ruler and butted up against it. Applying firm pressure on the rotary cutter, start from the bottom of the fabric and roll the cutter towards the top. Before removing the ruler, make sure a complete cut has been made. If the ruler is still in place, you can simply run the rotary cutter again until the fabric has been completely cut.


The second cut will be to create a 3" strip of fabric. Without moving the fabric from the first cut, take your ruler and align it on a vertical line three inches from the initial cut. Using the same process as above, cut the 3" strip.

Now that you have a 3" strip of fabric, the next step is to cut the strip into blocks. Depending on the length of your fabric, you may want to rotate the mat so that the longer edge is perpendicular to you. The key is you want to move the fabric as little as possible.
Lay out your 3" strip of fabric length-wise so that the long edge is aligned with a horizontal line on the mat. Align the ruler with one of the vertical lines on the mat close to one of the 3" edges and use the cutter to "clean up" the edge to ensure a straight line. Without moving the fabric, pick up your ruler and align it with a vertical line 3" from the edge of the fabric. Use the rotary cutter to cut the fabric. Continue doing this until you have cut out all of your 3" blocks.


Sewing projects require various fabric sizes and shapes, but these same steps and tips will guide you as you cut the fabric for each project.
0 Response to "Using a Rotary Cutter"
Post a Comment