Modern-Striped Twin Quilt - Session #2 of 4

Supplies/Materials:
For a list of supplies and materials, refer to Modern-Striped Twin Quilt - Session #1 of 4.
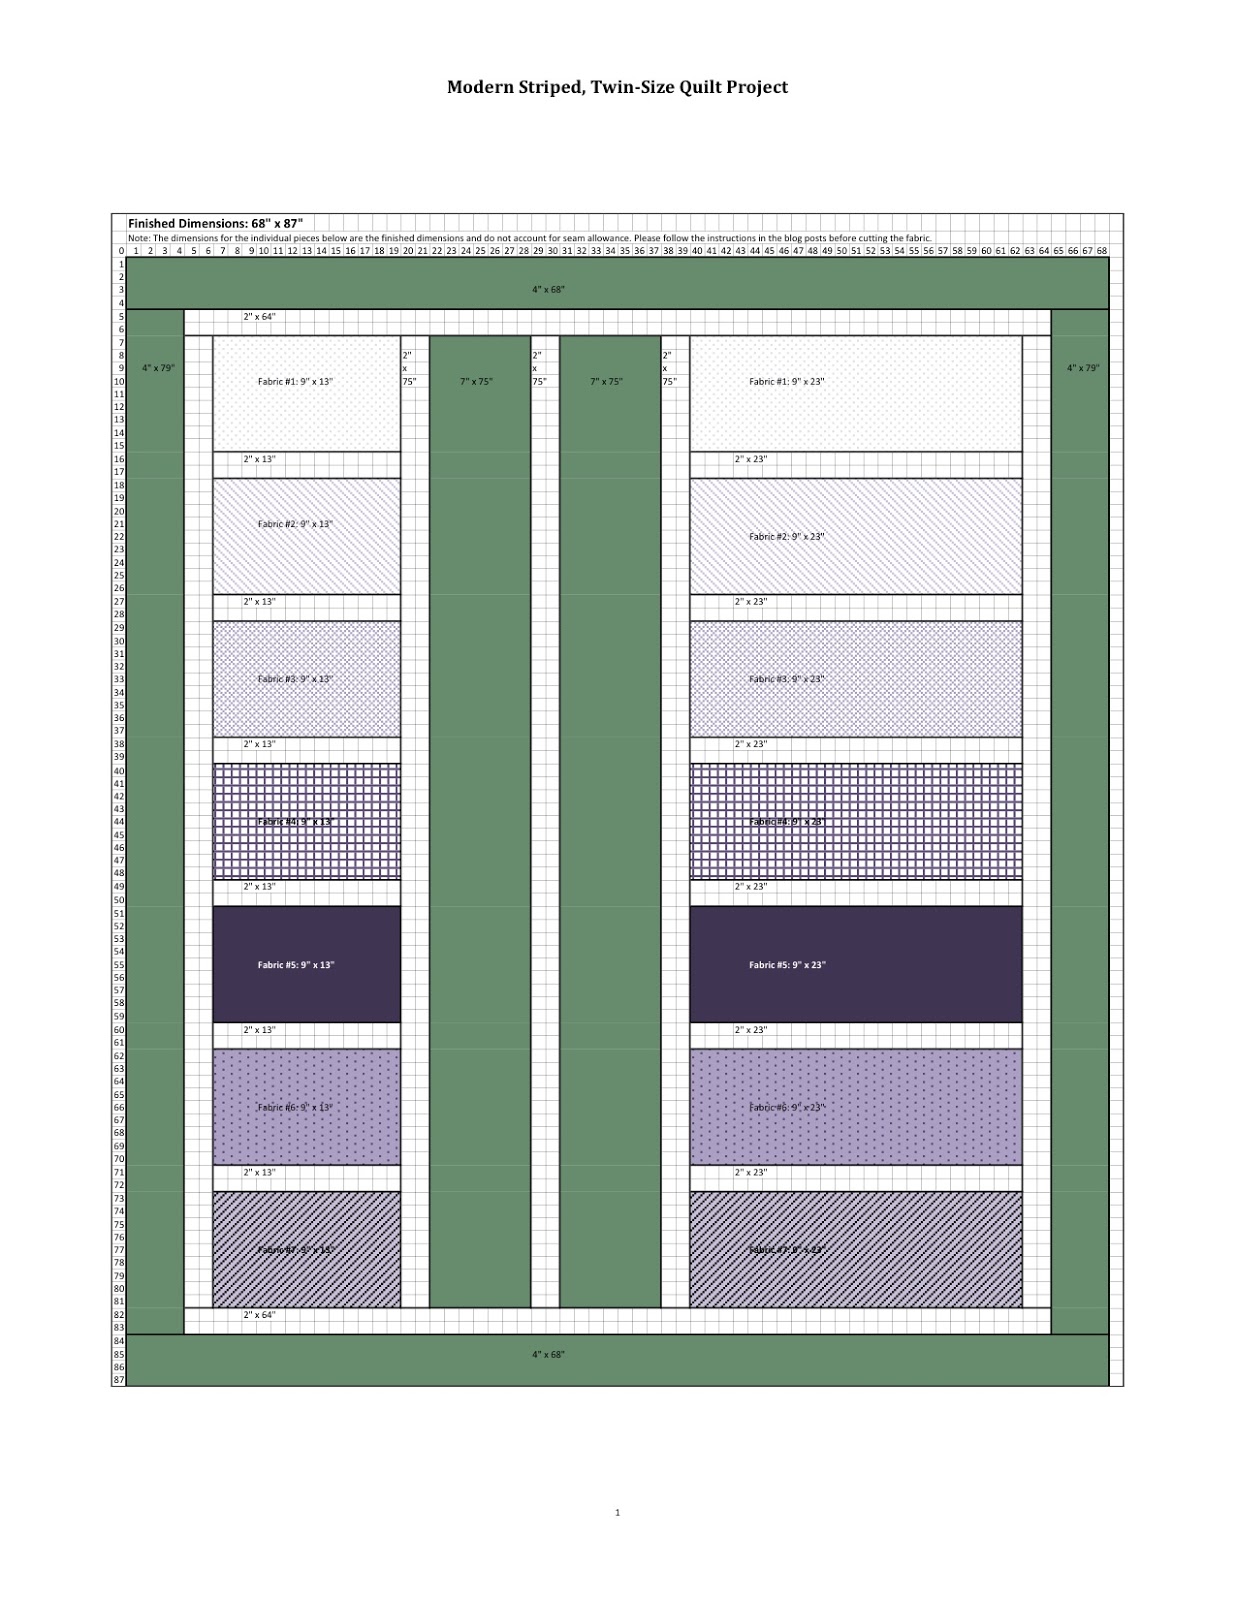
As a refresher, here is the project design and its dimensions. The finished, twin-size quilt is 68" x 87".
As I mentioned in the previous post, the instructions for this project will be broken down into four sessions. The four sessions are as follows:
- Cutting the Fabric
- Piecing the Quilt Top
- Sewing the Borders and Preparing for Finishing
- Finishing the Quilt: Tying and Binding
*****
Session #2: Piecing the Quilt Top
Now that the pieces for the top of your quilt are cut (Refer to Session #1), you will begin sewing the quilt together; this is also called “piecing the quilt”. Using the design (above) as a guide, lay out your horizontal and vertical strips in the desired design leaving enough room to place the 2 ½” white borders in between each strip. I like to lay out the design to ensure that I am sewing the pieces together in the proper order. (See the picture below.)

First, you will sew the row of horizontal strips together: first the row that is 13 ½” wide and then the row that is 23 ½” wide. You will sew a white border in between each horizontal strip of fabric you have cut out.
To begin sewing, pin the right sides one of the white borders to the first horizontal strip.


Pin the pieces of fabric together and sew using a 1/4" seam allowance.


After the horizontal strip is sewn to the white border, use an iron to press open the seam.


Continue sewing the next strip to a white border following the instructions described above. Then, sew the two blocks together ensuring that a white border is sewn between each horizontal strip.


Continue until the entire row of 13 1/2" strips are sewn together. Proceed with sewing the 23 1/2" wide strips together as you did with the previous strips.
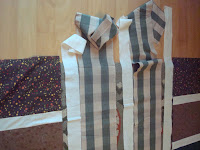
Here is a picture of the completed strips:

Next, we will sew the vertical strips. Before sewing, lay out your pieces of fabric.


Proceed with sewing the vertical strips as shown below:

When pinning the pieces together, make sure you pin the seam open, as shown below. This creates a smoother, less bunchy seam.


When finished sewing, press the seams open. Continue sewing the vertical strips together as shown below:


Finally, sew the two sections together to complete the quilt top.


Pin the pieces of fabric together and sew using a 1/4" seam allowance.


Continue sewing the next strip to a white border following the instructions described above. Then, sew the two blocks together ensuring that a white border is sewn between each horizontal strip.


Continue until the entire row of 13 1/2" strips are sewn together. Proceed with sewing the 23 1/2" wide strips together as you did with the previous strips.
Here is a picture of the completed strips:


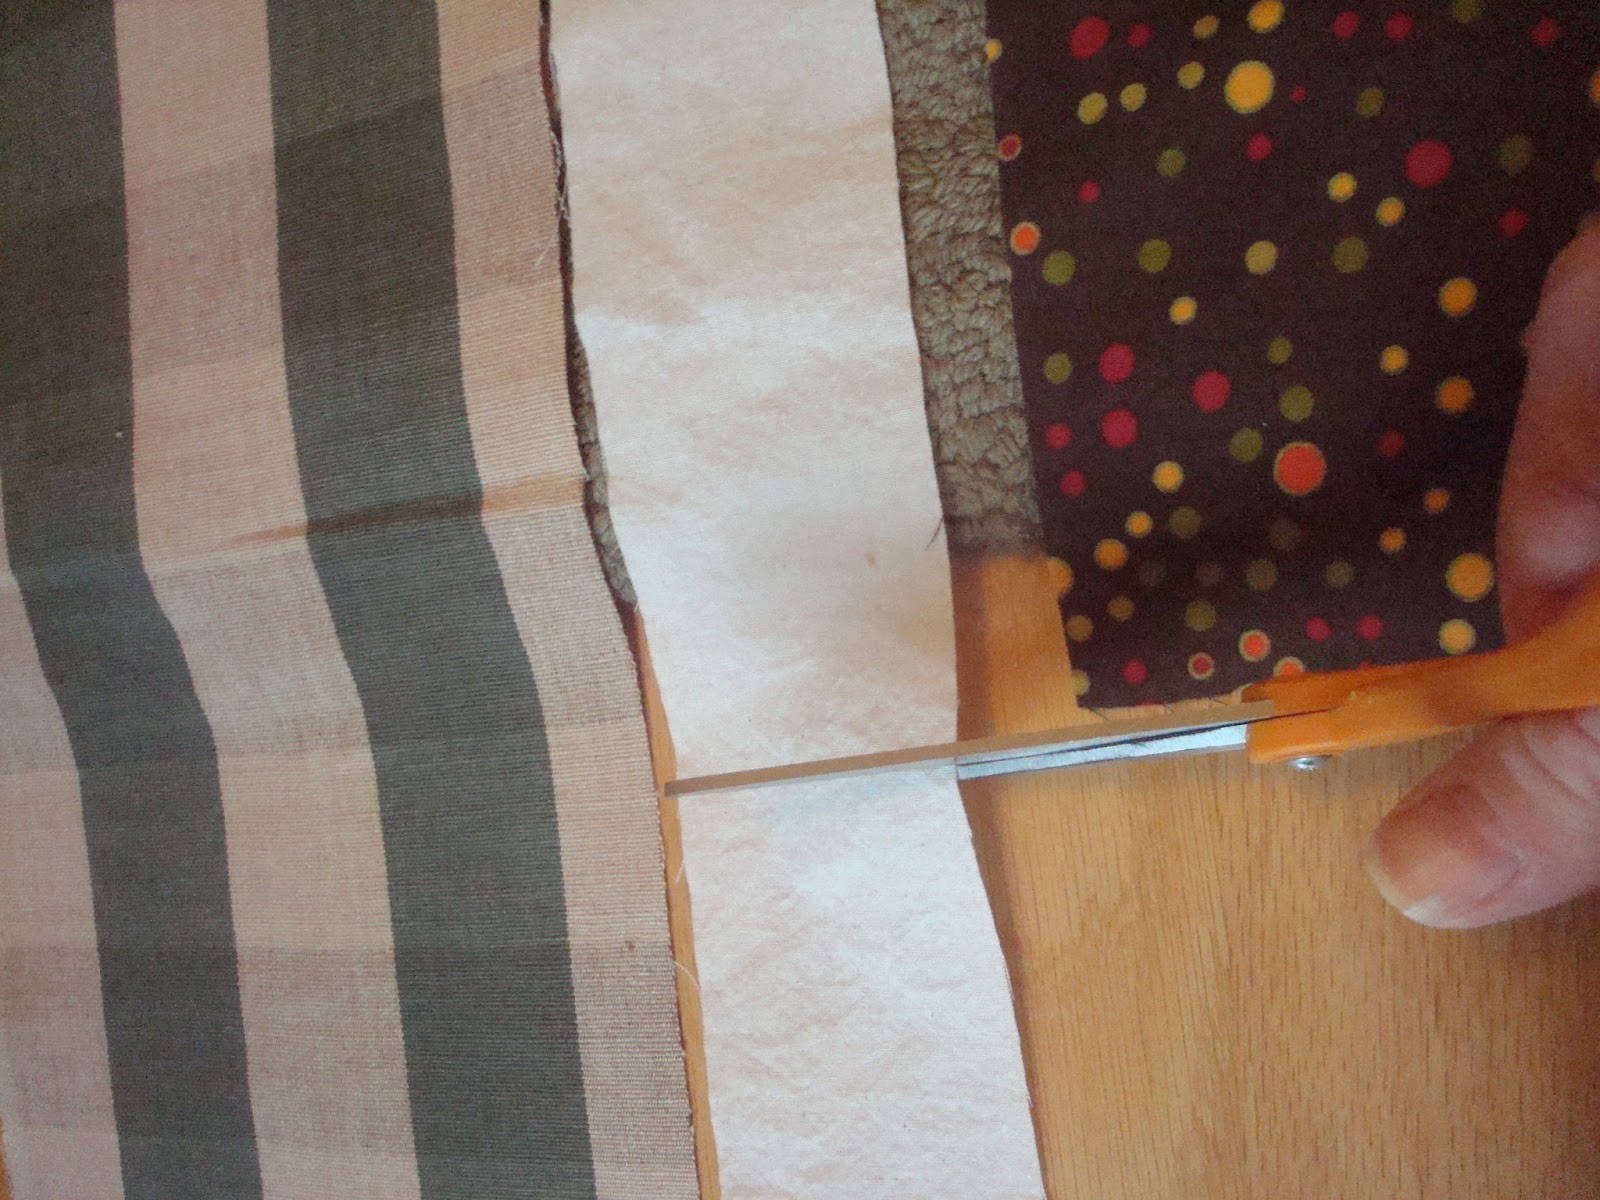
In Session #1, you cut the vertical strips the proper width, but you did not cut the strips to length. Now is the time you will cut the vertical strips to the proper length. Sometimes when piecing fabric together, the dimensions can be slightly off (due to a variance in cutting or seam allowance). So, you waited until the horizontal strips were sewn together before cutting the vertical strips to ensure the correct length.
Cut the vertical strips to length using scissors. When cutting the vertical strips, leave an extra few inches for a margin of error. You can trim the excess fabric at a later time.
Cut the vertical strips to length using scissors. When cutting the vertical strips, leave an extra few inches for a margin of error. You can trim the excess fabric at a later time.


When pinning the pieces together, make sure you pin the seam open, as shown below. This creates a smoother, less bunchy seam.


Congratulations! Step #2 of 4 is complete.
0 Response to "Modern-Striped Twin Quilt - Session #2 of 4"
Post a Comment